Tile roof installation is a durable and aesthetically pleasing solution for homeowners, offering structural protection and enhancing curb appeal when done correctly with proper techniques;
Importance of Proper Roof Installation
Proper tile roof installation ensures structural integrity, protecting your home from weather damage and enhancing safety․ Incorrect methods can lead to leaks, structural weaknesses, and reduced lifespan․ A well-installed roof prevents water infiltration, maintains energy efficiency, and preserves aesthetic appeal․ It also avoids costly repairs and ensures compliance with building codes․ Proper installation is vital for withstanding environmental stresses, providing long-term durability, and maintaining the overall value of your property․ Investing in correct techniques guarantees a secure and reliable roofing system for years to come․
Benefits of Tile Roofs
Tile roofs offer exceptional durability, lasting up to 50 years or more with proper maintenance․ They are fire-resistant, low-maintenance, and provide excellent insulation, reducing energy costs․ Their aesthetic appeal boosts curb appeal and property value․ Tiles are environmentally friendly, as many are made from sustainable materials․ They also withstand harsh weather conditions, including heavy rain, hail, and high winds․ With a wide range of styles and colors, tile roofs cater to various architectural designs, making them a versatile and long-lasting choice for homeowners seeking both functionality and beauty․
Overview of the Installation Process
Tile roof installation involves several key steps, starting with assessing the roof structure and preparing the deck․ Next, underlayment is installed to ensure waterproofing․ Battens are then set up to provide a secure base for the tiles․ The first row of tiles is carefully laid, followed by subsequent rows, ensuring proper alignment and spacing․ Tiles are secured with fasteners, and flashing is installed around vents and valleys for weatherproofing․ Finally, the roof is inspected for gaps or leaks, and any necessary adjustments are made to ensure a durable and watertight finish․

Preparation for Tile Roof Installation
Preparation for tile roof installation involves assessing structural integrity, planning the layout, and ensuring all safety measures and materials are ready for a successful project․
Assessing the Roof Structure
Assessing the roof structure is crucial to ensure it can support the weight of tile roofing․ Inspect for any damage, rot, or weaknesses in beams and rafters․ Verify that the roof deck is sturdy and even, as uneven surfaces can lead to installation issues․ Check local building codes and load-bearing capacities to confirm compatibility with tile roofing․ If unsure, consult a professional to evaluate the structure and recommend necessary reinforcements before proceeding with installation․
Choosing the Right Materials
Selecting the right materials is essential for a successful tile roof installation․ Opt for high-quality tiles made from durable materials like clay, concrete, or slate, ensuring they suit your climate and budget․ Consider factors like color, texture, and weight to match your home’s style and structural capacity․ Additionally, choose a reliable underlayment and weatherproofing membranes to protect against moisture․ Ensure all fasteners, adhesives, and flashing materials are compatible with your tiles and meet local building standards for longevity and performance․
Safety Precautions and Gear
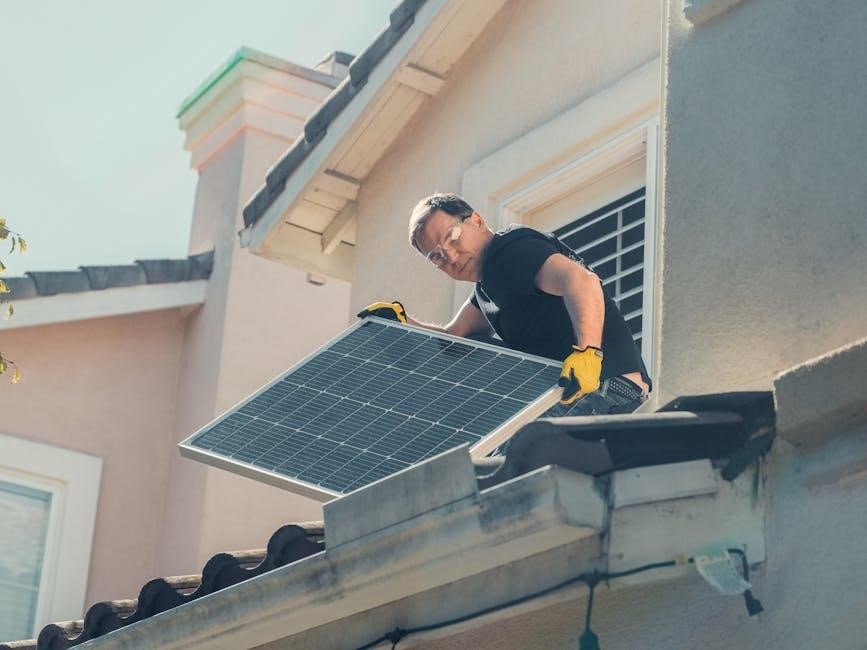
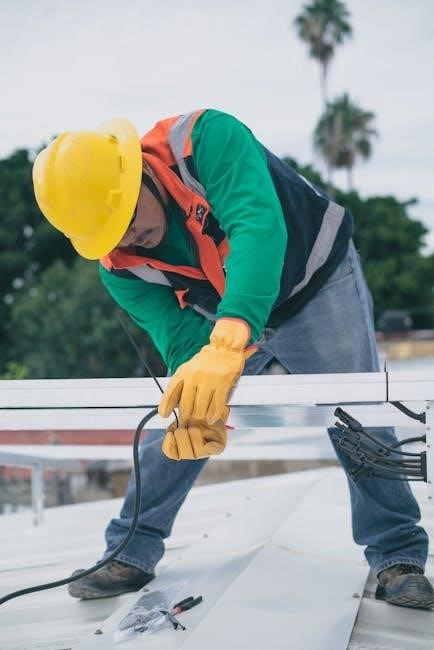
Safety is crucial during tile roof installation․ Always wear protective gear, including a hard hat, safety harness, gloves, and sturdy footwear with good traction․ Ensure proper ladder safety and secure the work area to prevent accidents․ Use eye protection when cutting tiles, and maintain a clean workspace to avoid tripping hazards․ Regularly inspect tools and equipment for damage․ Consider hiring professionals for complex tasks, especially if you’re inexperienced․ Prioritize weather conditions, avoiding installation during strong winds or rain to ensure a safe working environment․
Tools and Materials Needed
Essential tools include a tile cutter, drill, hammer, measuring tape, and safety gear․ Materials required are tiles, underlayment, roof battens, fasteners, and weatherproofing sealants․
Essential Tools for Tile Roof Installation
A tile cutter is crucial for precise tile cutting, while a drill and impact driver handle fastening․ A hammer aids in tapping tiles into place, and measuring tape ensures accuracy․ Safety gear like gloves and harnesses is vital for protection․ Ladders and scaffolding provide safe access, and a chalk line helps align tiles․ A utility knife is useful for minor cuts, and a level ensures even installation․ These tools are indispensable for a successful and efficient tile roof installation process․
List of Required Materials
Tile roof installation requires high-quality materials, including durable tiles (clay, concrete, or slate), underlayment for waterproofing, and roof battens for structural support․ Fasteners like nails or screws are essential for securing tiles․ Flashing is needed for weatherproofing around vents and chimneys, while sealants ensure airtight protection․ Valley tiles and vent flashing are critical for proper water flow and ventilation․ Additionally, insulation materials and roofing felt may be necessary for added protection․ These materials ensure a sturdy, weather-resistant, and long-lasting tile roof installation․

Step-by-Step Installation Process
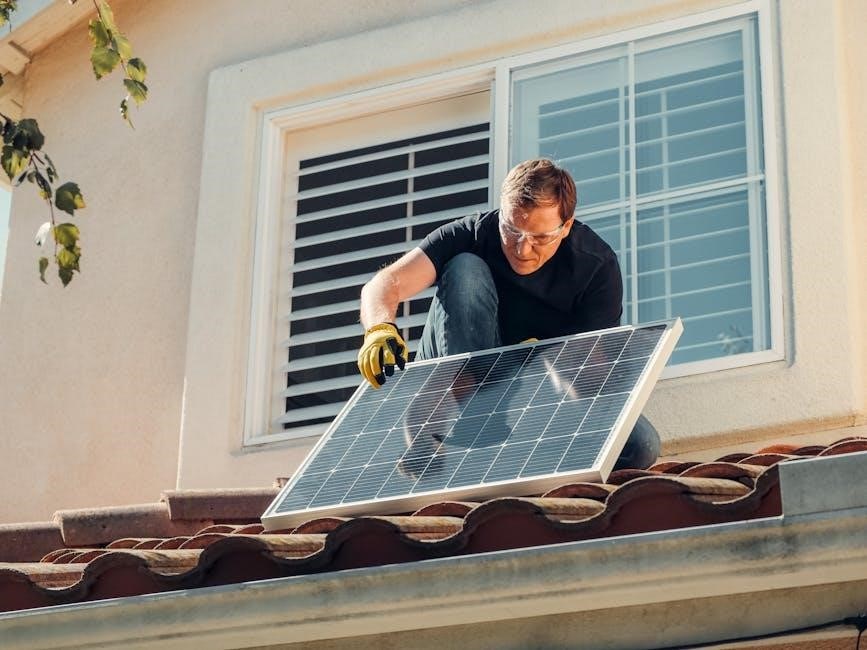
A systematic approach ensures a secure and durable tile roof․ Begin with deck preparation, followed by underlayment installation, then battens placement, and finally tile laying, ensuring alignment and adherence to manufacturer guidelines for a weather-tight finish․
Preparing the Roof Deck
Preparing the roof deck is crucial for ensuring structural integrity and durability․ Inspect the deck for damage or rot, and ensure it is level and secure․ Clean the surface thoroughly to remove debris․ Apply a waterproof membrane if required, and check for any gaps or cracks․ Ensure all repairs are completed before proceeding․ This step ensures a stable base for the underlayment and tiles, preventing future issues like leaks or structural weaknesses․ Proper preparation guarantees a solid foundation for the entire roofing system․
Installing Underlayment
Installing underlayment is a critical step for weatherproofing and protecting the roof deck․ Begin by unrolling the underlayment material, ensuring it aligns with the roof’s edges․ Secure it with fasteners, overlapping edges by at least 6 inches․ Apply additional layers if necessary, especially around vents or valleys․ Ensure the surface is smooth and free of wrinkles or air pockets․ Proper installation prevents water infiltration and extends the roof’s lifespan․ Always follow manufacturer guidelines for specific underlayment types, such as synthetic or asphalt-based products, to ensure compatibility with tile roofing systems․
Setting Up Roof Battens
Roof battens are horizontal or vertical wooden strips installed over the underlayment to provide a nailing surface for tiles․ Measure and cut battens to fit the roof’s dimensions, ensuring proper spacing as recommended by the tile manufacturer․ Install them horizontally for most tile types or vertically for specific designs․ Secure battens with durable fasteners to prevent movement․ Ensure battens are level and plumb to maintain structural integrity․ Properly aligned battens are essential for a secure and even tile installation, preventing future issues like uneven wear or water infiltration․
Laying the First Row of Tiles
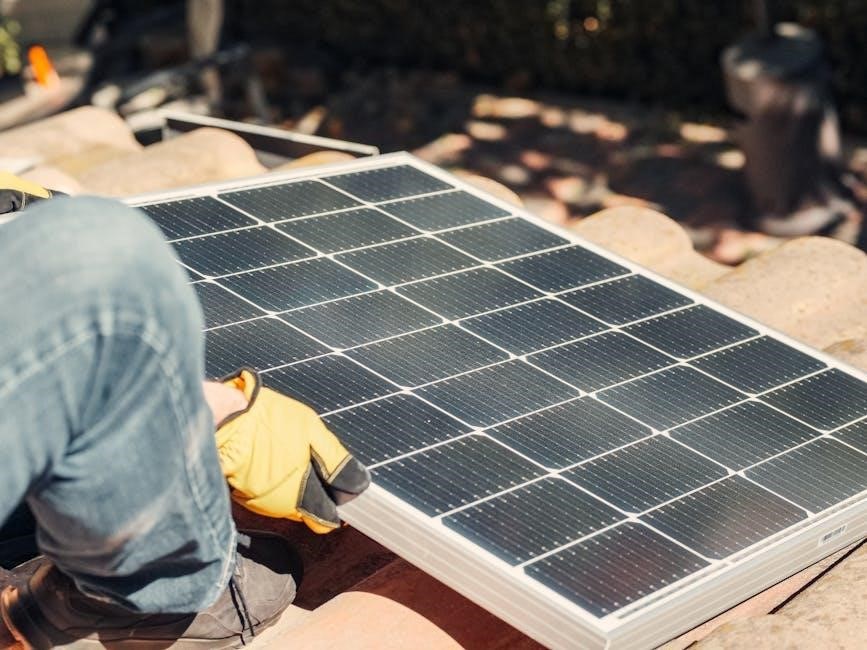
The first row of tiles is critical, as it sets the foundation for the entire roof․ Begin by aligning the first tile with the roof’s edge, ensuring it is straight and level․ Use a chalk line to guide placement and maintain consistent spacing between tiles․ Secure each tile with the recommended fasteners, ensuring they are tightly fitted to prevent shifting․ Proper alignment and spacing in the first row are essential for achieving a uniform and structurally sound installation․ This step requires precision to ensure the rest of the tiles align correctly․
Installing Subsequent Rows
After laying the first row, subsequent rows are installed by aligning each tile with the one below it, ensuring proper overlap and spacing․ Use a chalk line to maintain straight alignment across the roof․ Secure each tile with fasteners, following the manufacturer’s guidelines․ Stagger joints between rows to enhance structural integrity and prevent water infiltration․ Regularly check the alignment and spacing to ensure a uniform appearance․ Proper installation of subsequent rows is crucial for achieving a durable and visually appealing tile roof․ This step requires careful attention to detail to maintain consistency and stability․
Securing Tiles with Fasteners
Securing tiles with fasteners is a critical step to ensure the roof’s stability and durability․ Use high-quality, weather-resistant fasteners compatible with your tile material․ Place fasteners at the recommended spacing, typically near the tile’s center or as specified by the manufacturer․ Avoid over-tightening, which can damage the tile․ Ensure fasteners are driven straight and level to maintain even pressure․ Regularly inspect fasteners during installation to prevent misalignment․ Properly secured tiles will withstand harsh weather conditions and provide long-lasting protection for your home․ Always follow manufacturer guidelines for optimal results․
Cutting and Fitting Tiles
Cutting and fitting tiles requires precision to ensure proper fit and durability․ Use appropriate tools like tile cutters or saws for accurate cuts․ Always measure carefully and fit tiles around obstructions for a seamless finish․
Measuring and Marking Tiles
Accurate measuring and marking are critical for a professional finish․ Use a tape measure to determine tile dimensions and a pencil to mark cut lines clearly․ Ensure measurements align with the roof layout to fit seamlessly․ Double-check marks before cutting to avoid errors․ For curved or angled cuts, use a compass or template for precision․ Proper marking ensures tiles fit around vents, chimneys, and other obstructions, maintaining structural integrity and aesthetic appeal․ Always measure twice and cut once for optimal results․
Cutting Tiles Safely and Accurately
Cutting tiles requires precision and safety․ Use a tile cutter or wet saw for straight cuts, ensuring clean edges․ For curved cuts, mark the tile with a compass and cut slowly; Always wear safety goggles and gloves to protect against debris․ Score deeply before breaking to avoid uneven edges․ Use a diamond blade for clay or concrete tiles․ Keep the saw blade lubricated to prevent overheating․ Double-check measurements before cutting to minimize waste․ Proper cutting ensures a seamless fit and maintains the roof’s structural integrity and appearance․
Fitting Tiles Around Obstructions
Fitting tiles around obstructions like vents, chimneys, or skylights requires careful planning․ Measure the obstruction and mark the tile accordingly․ Use a tile cutter or wet saw to create precise cuts․ For irregular shapes, trace a template onto the tile and cut carefully․ Ensure the tile fits snugly, leaving minimal gaps․ Secure the tile with appropriate fasteners and seal gaps with weatherproofing materials to maintain the roof’s integrity and prevent leaks․ Proper fitting ensures a professional finish and protects against weather damage․
Flashing and Weatherproofing
Flashing and weatherproofing are crucial for protecting your roof from water damage and ensuring long-term durability․ Proper installation ensures a watertight seal and enhances structural integrity․

Installing Roof Flashing
Roof flashing is essential for preventing water infiltration at vulnerable points like chimneys, vents, and valleys․ Cut flashing material to fit specific areas, ensuring tight seals․ Apply adhesive-backed flashing securely, pressing firmly to avoid air pockets․ For non-adhesive types, use appropriate fasteners and sealants․ Ensure all edges are watertight and aligned properly with surrounding surfaces․ Flashing around protrusions must be meticulously fitted to prevent leaks․ Proper installation guarantees long-term weatherproofing and protects your roof from structural damage caused by moisture intrusion․
Sealing Valleys and Vents
Sealing valleys and vents is critical to prevent water leaks and ensure proper ventilation․ Valleys, where roof planes meet, are prone to water accumulation, requiring durable, waterproof materials like rubber or metal․ Vents must be tightly sealed to maintain airflow while preventing moisture entry․ Proper sealing prevents structural damage and extends roof lifespan․ Ensure all gaps are filled with compatible sealants․ Professional installation is recommended for reliability and long-term performance․
Ensuring Weatherproofing
Weatherproofing is essential to protect your tile roof from water damage and leaks․ Start by ensuring all flashing is securely installed around vents, chimneys, and valleys․ Use high-quality waterproof underlayment beneath tiles for added protection․ Seal gaps with compatible sealants to prevent water infiltration․ Regularly inspect and maintain weatherproofing elements to ensure longevity․ Proper weatherproofing enhances durability, prevents structural damage, and safeguards your home from environmental elements․ Always follow manufacturer guidelines for materials and techniques to achieve optimal results․
Ventilation and Insulation
Proper ventilation and insulation are crucial for maintaining temperature balance, preventing moisture buildup, and enhancing energy efficiency, ensuring a durable and comfortable roofing system․
Importance of Proper Ventilation
Proper ventilation is essential for maintaining a healthy roof system․ It regulates temperature, prevents moisture buildup, and reduces the risk of structural damage․ Adequate airflow ensures that heat and humidity are evenly distributed, preventing condensation that can lead to mold and rot․ This not only extends the lifespan of your roof but also improves energy efficiency and indoor comfort․ Without proper ventilation, tiles may warp, and insulation performance can degrade, leading to higher energy costs and potential repairs․ Ensuring good ventilation is a critical step in tile roof installation․
Installing Roof Vents
Installing roof vents is a crucial step in ensuring proper ventilation․ Begin by determining the optimal placement for vents, typically near the roof’s peak or eaves․ Use a saw to carefully cut openings in the roof deck, ensuring they align with the vent design․ Secure the vents using screws or nails, and apply weatherproofing material around the edges to prevent leaks․ Proper installation of roof vents enhances airflow, reduces moisture buildup, and maintains energy efficiency․ Always follow manufacturer guidelines for specific vent types and configurations․
Ensuring Adequate Insulation
Proper insulation is vital for energy efficiency and moisture control․ Install insulation materials like fiberglass, cellulose, or foam in the attic or between rafters․ Ensure the insulation covers the entire roof deck and meets local building codes․ A vapor barrier should be installed beneath the insulation to prevent moisture buildup․ Regularly inspect insulation for damage or gaps and address them promptly․ Adequate insulation not only reduces energy costs but also extends the lifespan of your tile roof․ Consult professionals for optimal insulation solutions tailored to your climate and roof design․
Final Inspection and Touch-ups
Final inspection ensures all tiles are secure, gaps are sealed, and the roof is leak-free․ Touch-ups include cleaning and minor repairs for a polished finish․
Checking for Gaps and Leaks
Inspecting the roof for gaps and leaks is crucial to ensure durability․ Examine every tile, joint, and flashing for cracks or misalignments․ Use a hose to simulate rainfall and check for water penetration․ Pay attention to valleys, vents, and chimneys, as these are common leak sources․ Shine a flashlight in the attic during daylight to spot any light gaps․ Addressing these issues promptly prevents structural damage and extends the roof’s lifespan․ Regular inspections are key to maintaining a watertight and secure tile roof system․
Adjusting or Replacing Damaged Tiles
Inspect the roof for cracked, broken, or loose tiles, especially after harsh weather․ Remove damaged tiles carefully to avoid further damage․ Check the underlayment for wear and replace if necessary․ Install new tiles, ensuring they align with adjacent ones․ Secure them firmly with fasteners or adhesive, depending on the type․ Use a rubber mallet to tap tiles into place without cracking․ Regularly maintaining and replacing damaged tiles prevents leaks and extends the roof’s lifespan․ Addressing issues early ensures the structural integrity and aesthetic appeal of the tile roof remain intact․
Final Clean-Up
After completing the installation, remove all debris, including leftover tiles, packaging, and tools․ Sweep the roof and surrounding areas to eliminate dust and dirt․ Clean any tools and equipment thoroughly․ Inspect the entire roof to ensure no stray materials remain․ Dispose of waste responsibly․ Power wash the roof if necessary to remove stubborn dirt or stains․ A clean finish enhances the roof’s appearance and ensures safety․ Proper clean-up is essential for a professional-looking tile roof installation and prevents potential hazards․
Maintenance and Repair
Regular inspections and timely repairs are crucial for extending the lifespan of tile roofs․ Address damaged or missing tiles promptly to prevent further damage and leaks․
Regular Maintenance Tips
Regular inspections are key to maintaining tile roofs․ Check for cracked or missing tiles, especially after storms․ Clean debris from valleys and edges to ensure proper water flow․ Inspect ridge caps and vents for damage․ Trim tree branches near the roof to prevent scratches․ Schedule professional inspections annually․ Address leaks promptly to avoid structural damage․ Keep gutters clear to prevent water buildup․ Ensure ventilation is adequate to prevent moisture accumulation․ Maintain records of inspections and repairs for warranty purposes․ Regular upkeep extends the roof’s lifespan and prevents costly repairs․
Identifying Common Issues
Common issues with tile roofs include cracked or broken tiles, which can lead to leaks․ Missing tiles expose the underlayment, risking water damage․ Loose tiles may slide off, especially in windy conditions․ Leaks often occur around vents, chimneys, or skylights due to poor flashing․ Debris accumulation in valleys can cause water pooling and damage․ Ridge caps may crack, compromising the roof’s integrity․ Regular inspections help spot these issues early, preventing costly repairs․ Addressing these problems promptly ensures the roof remains durable and weather-tight, maintaining its structural and aesthetic value over time․
DIY Repair Techniques
For minor tile roof repairs, homeowners can replace broken tiles by carefully removing the damaged piece and securing a new one with roofing adhesive or fasteners․ Loose tiles can be reattached using appropriate adhesives or screws․ Leaks around flashing should be sealed with waterproof sealants․ Always wear safety gear and use sturdy ladders․ Regular inspections help identify issues early․ While DIY repairs are cost-effective, major damage may require professional intervention to ensure long-term durability and safety․ Proper techniques and materials are essential to maintain the roof’s integrity and appearance․
Common Mistakes to Avoid
- Improper measurement and cutting of tiles can lead to poor fits and leaks․
- Insufficient fastening of tiles compromises structural integrity and durability․
- Poor weatherproofing techniques can result in water infiltration and damage․
Improper Measurement and Cutting
Improper measurement and cutting of tiles are common mistakes that can lead to poor fits, leaks, and structural issues․ Accurate measurements ensure tiles align correctly and seal properly․ Cutting tiles improperly can weaken their structure, making them prone to cracking․ Using the right tools, like a diamond blade saw, is essential for precise cuts․ Rushing this step can compromise the roof’s integrity, leading to costly repairs․ Always double-check measurements and cuts to maintain the roof’s durability and weatherproofing capabilities․ Proper techniques are crucial for a successful installation․
Insufficient Fastening
Insufficient fastening is a critical error that can lead to loose or lifted tiles, compromising the roof’s structural integrity․ Using too few or incorrect fasteners can result in tiles shifting during wind or weather events, causing leaks and damage․ It is essential to follow manufacturer guidelines for fastener type, quantity, and placement․ Properly securing tiles ensures long-term durability and prevents costly repairs․ Regular inspections can help identify and address fastening issues before they escalate, maintaining the roof’s stability and weatherproofing performance․ Always prioritize secure fastening to avoid potential hazards․
Poor Weatherproofing Techniques
Poor weatherproofing techniques can lead to leaks, water damage, and structural issues․ Improper flashing installation, inadequate sealing of valleys, and insufficient underlayment are common mistakes․ These errors compromise the roof’s ability to withstand rain, wind, and temperature fluctuations․ Water infiltration can rot wood, damage insulation, and harm interior spaces․ Proper weatherproofing ensures longevity and protection against environmental elements․ Always follow manufacturer guidelines for sealing materials and flashing installation to maintain the roof’s integrity and prevent costly repairs․ Regular inspections can help identify and address weatherproofing flaws early․
Cost Estimation and Budgeting
Accurate cost estimation ensures budgeting for materials, labor, and permits․ Factors like roof size, tile type, and location influence expenses․ Plan meticulously to avoid overspending․
Calculating Material Costs
Material costs for tile roof installation vary based on roof size, tile type, and underlayment․ Tiles range from $3 to $15 per square foot, depending on material quality․ Underlayment, battens, and fasteners add to expenses․ Flashing and weatherproofing materials are additional․ Estimate total costs by measuring the roof area and summing the prices of all components․ Research suppliers for the best rates and consider bulk discounts․ Accurate calculation ensures a realistic budget and avoids mid-project shortages or overspending․
Labor Costs and Time Estimates
Labor costs for tile roof installation vary based on location, contractor rates, and project complexity․ On average, labor can range from $3 to $7 per square foot․ Time estimates depend on roof size and crew size; a typical single-family home may take 3-7 days․ Complex designs or large roofs require more time․ Factors like weather and site accessibility also impact duration․ Consulting professionals ensures accurate quotes and efficient project completion․
Budgeting Tips
When planning a tile roof installation, allocate 10-15% of your total budget for unexpected expenses․ Compare quotes from multiple contractors to find the best value․ Prioritize quality materials and skilled labor over cheaper options to ensure longevity․ Consider the long-term savings on maintenance and energy bills․ Timing your project during the off-season may reduce costs․ Create a detailed budget breakdown, including materials, labor, and permits, to avoid financial surprises․ Regularly review and adjust your budget to stay on track․
A successful tile roof installation ensures durability, protection, and aesthetic appeal․ Proper techniques, quality materials, and regular maintenance are key to a long-lasting and weather-tight roof system;
A successful tile roof installation involves assessing the structure, preparing the deck, installing underlayment, setting battens, laying tiles, and securing them with fasteners․ Proper flashing, ventilation, and weatherproofing ensure durability․ Regular maintenance and inspections are crucial for longevity․ Following these steps carefully guarantees a sturdy, weather-tight, and visually appealing roof system that protects your home for years to come․
Final Thoughts on Successful Installation
A well-executed tile roof installation ensures long-term durability, aesthetic appeal, and protection for your home․ Attention to detail, adherence to guidelines, and proper maintenance are key to a successful project․ By following the outlined steps and avoiding common mistakes, you can achieve a roof that not only enhances your property’s value but also withstands harsh weather conditions․ Remember, a tile roof is a significant investment, and careful planning and execution will ensure it remains a reliable and attractive feature of your home for decades․